Gluten Free Zucchini Slice

Thursday, 13 June 2024


This is a delicious light and fluffy gluten free and dairy free Zucchini Slice. Super easy to make, bake and eat. You can also freeze and it reheats beautifully as if freshly made. 

My slice pan was smaller than recommended so if you don't have the size listed below a smaller one will be fine. 


Gluten Free Zucchini Slice

Ingredients

2 zucchini, coarsely grated
1 brown onion, finely chopped
3 bacon rashers, finely chopped
1 cup (120g) shredded dairy free tasty cheddar
1 cup (150g) gluten free self-raising flour
1/2 cup (125ml) light olive oil
5 Coles Australian Free Range Eggs, lightly whisked

Method

1. Preheat oven to 180°C. Grease a 20cm x 30cm slice pan and line with baking paper. Place the zucchini in a colander over a large bowl and use your hands to squeeze as much liquid from zucchini as possible. Discard the liquid.
   
2. Place zucchini in the bowl. Add the onion, bacon, cheese, flour, oil and egg and stir to combine. Season. Pour into the prepared pan. Bake for 35-40 mins or until golden brown and cooked through. Cut into pieces to serve.
 

Original recipe is here


Nutritional information
Per serve: Energy 2146kJ/513 Cals (25%), Protein 19g (38%), Fat 39g (56%), Sat Fat 12g (50%), Carb 21g (7%), Sugar 3g (3%), Dietary Fibre 2g (7%), Sodium 819mg (41%).


Low Carb Gluten Free Chocolate Brownies


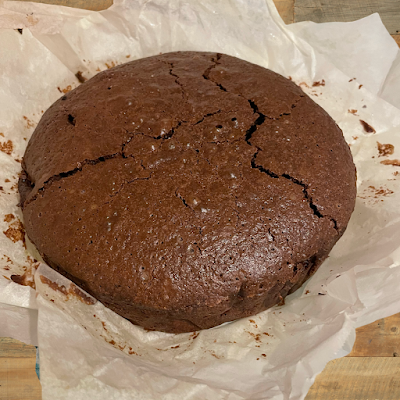
My doctor put me on a low carb diet and I wanted something sweet and found these delectable delights. I made these gluten free and they are delicious. Only 15 carbs per slice. 

I don't make brownies often because I always over bake them and they become cake but these are different. I baked them for about 90 minutes and they stayed soft the whole time but the edges went hard. The middle stayed gooey! 

Just cook them for the 40 minutes let them cool and they will bake further until they cook. Good luck! hahaah


Low Carb Gluten Free Chocolate Brownies

Ingredients
185g Nuttelex - dairy free margarine
185g best dark chocolate
85g gluten free plain flour
40g cocoa powder
50g white chocolate chopped into small chunks
50g milk chocolate chopped into small chunks
3 large eggs
275g raw caster sugar


Method

1. Put margarine into a heat proof medium bowl. Break 185g dark chocolate into small pieces and drop into the bowl.
    
2. Fill a small saucepan about a quarter full with water, then sit the heat proof bowl on top so it rests on the rim of the pan, not touching the water. Put over a low heat until the butter and chocolate have melted, stirring occasionally to mix them. Remove the bowl from the pan.
    

3.  Alternatively, cover the bowl loosely with cling film and put in the microwave for 2 minutes on High. Leave the melted mixture to cool to room temperature.
    

4. While you wait for the chocolate to cool, position a shelf in the middle of your oven and turn the oven on to 180C/160C fan/gas 4.
 

5. Using a 20cm square tin, cut out a square of kitchen foil (or non-stick baking parchment) to line the base. Tip 85g gluten free plain flour and 40g cocoa powder into a sieve held over a medium bowl. Tap and shake the sieve so they run through together and you get rid of any lumps.
    
6. Break 3 large eggs into a large bowl and tip in 275g raw caster sugar. With an electric mixer on maximum speed, whisk the eggs and sugar. They will look thick and creamy, like a milk shake. This can take 3-8 minutes, depending on how powerful your mixer is. You’ll know it’s ready when the mixture becomes really pale and about double its original volume. Another check is to turn off the mixer, lift out the beaters and wiggle them from side to side. If the mixture that runs off the beaters leaves a trail on the surface of the mixture in the bowl for a second or two, you’re there.
    
7. Pour the cooled chocolate mixture over the eggy mousse, then gently fold together with a rubber spatula. Plunge the spatula in at one side, take it underneath and bring it up the opposite side and in again at the middle. Continue going under and over in a figure of eight, moving the bowl round after each folding so you can get at it from all sides, until the two mixtures are one and the colour is a mottled dark brown. The idea is to marry them without knocking out the air, so be as gentle and slow as you like.
   
8. Hold the sieve over the bowl of eggy chocolate mixture and resift the cocoa and flour mixture, shaking the sieve from side to side, to cover the top evenly.
    
9. Gently fold in this powder using the same figure of eight action as before. The mixture will look dry and dusty at first, and a bit unpromising, but if you keep going very gently and patiently, it will end up looking gungy and fudgy. Stop just before you feel you should, as you don’t want to overdo this mixing.

10. Finally, stir in the white and milk chocolate chunks until they’re dotted throughout.
    
11. Pour the mixture into the prepared tin, scraping every bit out of the bowl with the spatula. Gently ease the mixture into the corners of the tin and paddle the spatula from side to side across the top to level it.
    

12. Put in the oven and set your timer for 40 mins. When the buzzer goes, open the oven, pull the shelf out a bit and gently shake the tin. If the brownie wobbles in the middle, it’s not quite done, so slide it back in and bake for another 5 minutes until the top has a shiny, papery crust and the sides are just beginning to come away from the tin. Take out of the oven.


13. Leave the whole thing in the tin until completely cold, then, if you’re using the brownie tin, lift up the protruding rim slightly and slide the uncut brownie out on its base. If you’re using a normal tin, lift out the brownie with the foil (or parchment). Cut into quarters, then cut each quarter into four squares and finally into triangles.

14. They’ll keep in an airtight container for a good two weeks and in the freezer for up to a month.


Original recipe is here with video.


Gluten Free Japanese Souffle Pancakes

Wednesday, 15 May 2024


I saw this Japanese Souffle pancake recipe and had to make it gluten free and it worked a treat.

I made it for mum on Mother's Day and she just woofed them down hahah

So easy to make once you get the hang of it. Careful not to have a pan that is too hot to start with keep it the heat low so they don't burn. 

Enjoy!


Gluten Free Japanese Souffle Pancakes

1/2 cup (75g) gluten free plain flour
1/2 tsp baking powder
1/4 cup (40g) icing sugar mixture
1/3 cup (80ml) milk
1 tsp vanilla extract
2 free-range eggs, separated
1/2 tsp cream of tartar or white vinegar
20g margarine, melted
Honey, to serve


 Method

1. Whisk the gluten free flour, baking powder, icing sugar, milk, vanilla and egg yolks in a large bowl until smooth.

 2. Use an electric mixer to whisk the egg whites and cream of tartar in a large bowl until stiff peaks form. If you don't have tartar you can use vinegar like I did.
    
3. Add one-third of the egg white mixture to the flour mixture and use a large metal spoon to gently fold until just combined. Add the remaining egg white mixture and gently fold until just combined.

4. Grease two 7cm egg rings or round metal cookie cutters. Heat a medium non-stick frying pan over low heat and brush with some melted margarine. Place cutters in the pan and fill with ¼ cup (60ml) pancake batter.


 Cook, covered, for 5-6 mins or until bases are golden. 


Carefully turn the pancakes and use tongs to remove cutters. Cook, covered, for 3 mins or until just set. Transfer to a plate. Repeat with remaining butter and batter. It helps to use the timer on your phone to help with these times.
 
5. Divide pancakes among serving plates and top with berries. Drizzle with honey or any toppings of you choice then serve.

I ate them as I made them so no serving needed hahaah. They went straight into my mouth other than the ones I gave to mum.

Gluten Free Chocolate Mud Cake with Caramel Ganache

Wednesday, 8 May 2024


I wanted to make this gluten free Chocolate Mud Cake with Caramel Ganache for ages. Then last week I made it because I am about to start on Ozempic and I wanted a good last treat before I began as I am only allowed 100 gm of carbs per day!

I changed the butter to margarine to reduce the lactose in the cake. It is ridiculously delicious. Its one of the best cakes I have ever made and eaten. The ganache is ridiculously delicious too. 
 
I also added small chocolate eggs on top as I made it for Easter Sunday. The original recipe calls for caramel popcorn but you can add any toppings you like.  

Once it goes in the fridge it gets very hard so I recommend heating it up in the microwave for 25 seconds per slice. Then it warms and softens as it came fresh out of the oven.

This cake gets very solid once you put it in the fridge so zapping it in the microwave for about 25 seconds per piece makes it soft and delicious as if it came fresh out of the oven. 
 
You're welcome!

Gluten Free Chocolate Mud Cake with Caramel Ganache

Ingredients
1 1/2 cups (330g) brown sugar
250g margarine room temperature
200g dark chocolate, chopped
2 free-range eggs room temperature, lightly whisked
1 1/4 cups (185g) gluten free plain flour
1/4 cup (35g) gluten free self-raising flour
1/4 cup (35g) gluten free cornflour
1/4 cup (25g) cocoa powder

Caramel Ganache
2 x 180g pkts or 1 x 350gm pkt Cadbury Caramilk chocolate, chopped
1/3 cup (80ml) Zymil lactose free thickened cream


Method

1. Preheat oven to 150°C. Grease the base and side of a 17cm (base measurement) round cake pan and line with 2 layers of baking paper. Combine the sugar, cocoa powder, margarine, chocolate and 1 cup (250ml) water in a large saucepan over low heat. 

Cook, stirring, for 5 mins or until the margarine and chocolate melt and the mixture is smooth. Transfer to a heatproof bowl and set aside for 10 mins to cool down.
 
2. Add eggs to the chocolate mixture and whisk to combine. Sift combined flours and cocoa powder over the chocolate mixture and whisk to combine. Pour into the prepared pan.
    
3. Bake for 1 1/4 hours or until a skewer inserted in the centre comes out clean. Set aside in the pan to cool completely.   

Delicious Gluten Free Chocolate Mud Cake


4. To make caramel ganache, place the chocolate and cream in a heatproof bowl over a saucepan of simmering water (don’t let bowl touch the water). 

Stir with a metal spoon until chocolate melts and mixture is smooth. Place in the fridge, stirring occasionally, for 1 hour or until ganache thickens and is a spreadable consistency.

5. Place cake on a plate. Spread with ganache and enjoy.


 Original recipe from Coles Magazine.


Avengers Gluten Free Zebra Cake

Wednesday, 7 September 2022

Avengers Gluten Free Zebra Cake

I made this gluten free Avengers zebra birthday cake for my nephews 10th birthday. I wanted to make something different so decided to mix chocolate and vanilla together. 

This cake did not turn out well at all inside hahaha. Somehow little rocks formed! My sister said did you put rice bubbles in here. I didn't. I don't know what happened it didn't work out but it did look good. I would love to try again especially for the icing which saved the cake because the next day it was soooo dry inside haahah.

I completely forget to photograph inside but its for the best because it looked a mess. It looked more like a chocolate cake with specks of vanilla inside. 

The Avengers flying on top of the cake and the personalised cake topper I got from eBay.

Let me know if you try it and it works!

Avengers Gluten Free Zebra Cake

Base vanilla cake batter:

1 1/4 cups (300 grams) lactose free milk or any dairy free milk, room temperature
2 tsp apple cider vinegar (to be mixed with dairy free milk)
3 2/3 cups (460 grams) gluten free plain flour
2 tsps baking powder
1 tsp baking soda
1 cup (220 grams) white sugar
3/4 cup (170 grams) flora margarine or any dairy free margarine, room temperature
3/4 cup (190 grams) mashed bananas (3 small or 2 large) or pureed applesauce, room temperature
1 tbsp vanilla extract

For the chocolate cake batter:

1/3 cup (33 grams) cocoa powder
1/4 cup (60 grams) Zymil lactose free milk or dairy free milk
2 tbsp dairy free margarine or butter, melted and cooled

Buttercream

2 cups (460 g) dairy free margarine or vegan butter, room temperature
1 cup (100 grams) sifted cocoa powder
3 cups (600 grams) sifted powdered sugar
1/4–1/3 cup dairy free milk (such as soy milk or oat milk)
 

Instructions

Preheat the oven to 180C/350 F. Grease two 20cm/8″ cake pans with cooking oil, and line them with baking paper/parchment paper. Set aside.

Prepare the buttermilk. Combine the milk with the apple cider vinegar, and set aside to sit for 5-6 minutes. 

In the meantime in a medium bowl, stir together the flour, baking powder, and baking soda. Set aside.

Make the vanilla batter: In a stand mixer with paddle attachment or a large bowl with hand mixer, cream together the margarine and sugar until fluffy, about 2-3 minutes. Scrape down the sides as needed. Then add in the pureed banana or applesauce and vanilla extract. 

Mix again on medium speed until combined, scraping down the sides as needed. Add in about half of the dry mixture, along with half of the buttermilk, and mix on medium speed until just combined. 

Add in the remaining dry mixture and buttermilk and mix on medium speed until there are no more dry streaks. Make sure to scrape the bottom of the bowl as well as the sides.

Make the chocolate batter: divide half of the vanilla cake batter into a separate bowl. Add in the cocoa powder, remaining dairy free milk and melted butter into one of the bowls. Stir the ingredients gently into the batter until it becomes a chocolate cake batter.

I DON'T UNDERSTAND THIS PART AT ALL BUT HERE ARE THE INSTRUCTIONS:
How to make a zebra pattern in the batter: now we’ll divide the batter into the cake pans in a zebra pattern.  Take a large spoon and spoon about 1/4 cup of vanilla batter into the middle of both cake pans. Then take another large spoon and spoon about 1/4 cup of chocolate batter directly on top of the vanilla cake batter. 

Repeat, alternating between vanilla and chocolate cake batter until the batters are finished. Gently tilt the cake pans to get the batter to touch the edges of the pan if they aren’t already. Do not tap the cake pans onto countertop. This will release any air bubbles that will help the cake rise.

Bake the cakes immediately after creating the zebra pattern. Bake for 35 - 45 minutes or until the toothpick comes out clean.

Remove from the oven and allow the cakes to cool in their pans for 10 minutes, then transfer them to a cooling rack to cool completely. Once cooled completely (there is absolutely no warmth to the touch!), then you can prepare your buttercream.

Buttercream
In a large bowl with a hand mixer, cream the butter until fluffy and light, about 2-3 minutes.

Add in the cocoa powder and 1 cup of the powdered sugar. Continue creaming the mixture, adding in the remaining icing sugar in 1 cup intervals until smooth. Add in 1-2 tbsp dairy free milk at a time to help achieve a creamy texture.

Ice the cake as desired, slice and enjoy!


The original recipe is from Banana Diaries and here is the buttercream recipe.


Gluten & Dairy Free Chocolate Coconut Balls

Monday, 22 August 2022


I saw a can of condensed coconut milk which excited me no end and had to make gluten free and dairy free chocolate coconut balls. At Coles is where I found the condensed milk and on the can is where I found the recipe but changed the biscuits to gluten free.

So easy to make and taste absolutely delicious to eat. You would never know the difference. 

Enjoy.


Gluten and dairy free chocolate coconut balls

Ingredients
1 packet (205g) Leda Arrowroot Biscuits (Gluten, dairy, egg free and plant based from Coles)
1/3 cup (40g) cocoa powder
1/2 cup (45g) desiccated coconut
(Extra for rolling balls in)
1 tin (320g) Condensed coconut milk

Method
Crush biscuits and place in a mixing bowl.

Add cocoa and coconut and stir together.

Add condensed milk and mix until combined.

Take small amount of mixture and roll into balls then roll around on extra coconut to coat the outside of balls.

Place the chocolate balls on a tray and into the fridge to chill for 30min.

Remove from tray and store in an air proof container and enjoy

Figs in Syrup

Saturday, 4 June 2022


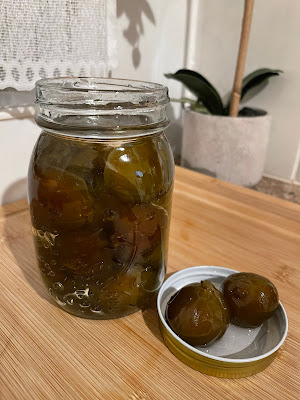
We cut down our fig tree because it attracted all the wildlife but there were many small figs on the branches so I picked them and with my sisters suggestion I made figs in syrup.

The recipe I found said to use almonds and pour lemon juice on the figs which I did but I don't think this is necessary so I will take these steps out of the recipe. If you want to follow full recipe just click on link at bottom of page. 


Figs in Syrup

Ingredients
25 figs
1 kilo sugar
25 cloves
3 cups of water

Method
Rinse figs thoroughly.

Put them in a big pan with a lot of water and boil them for about 10 minutes.


 Strain them and rinse them with cold water. Put them back into the pan and boil them again for another 10 minutes. Strain them and put them in the same pan with cold water and leave them over night.

 The next day, change the water and boil them again. They should be soft and tender in 10 minutes. 

Strain them and place them on a towel and let them stand for 24 hours so that they will not have any more water inside them. 


Then insert a clove in each fig. (Original recipe called for almonds but they do absolutely nothing so skip this part).


Put 3 cups of water in a clean pan and stir in sugar to dissolve. Bring the syrup to the boil for 10 minutes. Skim the foam if necessary. 


Add the figs and continue boiling for another 10 minutes. Let them stand until the next day.


 The next day start the boiling again until you have a thick and sweet syrup.


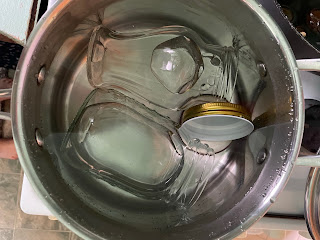
Sterilize jars by boiling them for 10 minutes then let stand to cool. Sterilizing will add 3-4 years storage of the figs.


 Place figs in syrup in jars and store or enjoy straight away.


Original recipe for the figs in syrup is here


Related Posts Plugin for WordPress, Blogger...

Sia's Cooking Blog Designed by Ipietoon Blogger Template