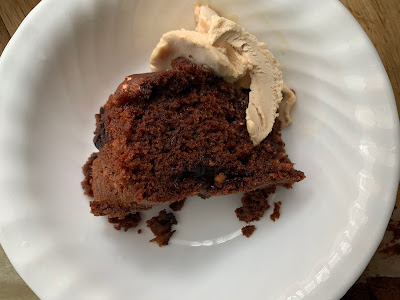
Gluten Free Chocolate Fudge Bundt Cake

Sunday, 22 December 2019

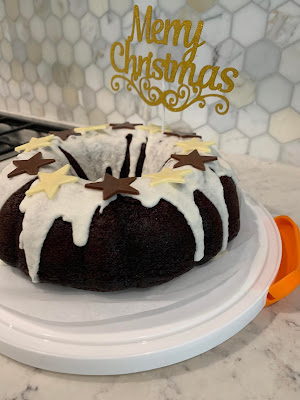
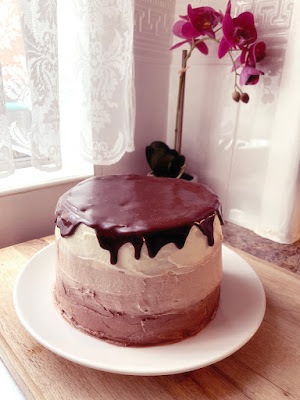
Christmas Gluten Free Chocolate Fudge Bundt Cake


 Christmas Gluten Free Chocolate Fudge Bundt Cake Recipe

 Christmas Cake Gluten Free Chocolate Fudge Bundt Cake

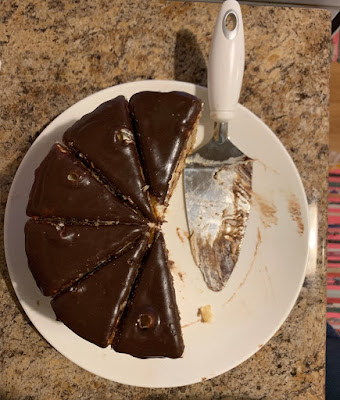
 Gluten Free Chocolate Fudge Bundt Cake Inside

I wanted to make a gluten free chocolate cake with a bundt tin and found this divine gluten free chocolate bundt cake recipe after doing a search.

Of course I changed some ingredients and added the icing and decorations. I needed a gluten free chocolate cake for a Christmas party I was going to and found this chocolate bundt cake recipe.

At this party two other people were on a gluten free diet as well so three of us needed to be satisfied and satisfied we were.

This gluten free chocolate bundt cake got rave reviews from one of the teenage boys who was at the party and he ended up having two slices much to my delight.

He said it was MasterChef quality and wouldn't stop raving about the cake all night and asked me to make it for the New Years party which I will do gladly.

I was told to make sure to get a New Years topper though don't use the Christmas one. Hahahah boys are funny.

This was a hit. So easy to make and total fool proof!

Enjoy.

Gluten Free Chocolate Fudge Bundt Cake


Ingredients
1 1/2 cups caster sugar
1 3/4 cups plain gluten free flour
3/4 cup baking cocoa
2 teaspoons baking soda
1 teaspoon gluten-free baking powder
1 teaspoon salt
2 large eggs, room temperature
1 cup lactose free or dairy-free yogurt
1/2 cup light olive oil
1 teaspoon gluten free vanilla extract
1 cup hot water
½ cup chocolate chips

Icing
1 1/2 cups icing sugar sifted
1/4 cup margarine with olive oil
1/3 cup water

Instructions
Preheat oven to 350°F/180C. Grease a 10-inch/25cm Bundt cake pan; set aside.

In a large bowl, combine sugar, flour, cocoa, baking soda, baking powder, and salt.

In a separate bowl combine the eggs, yoghurt, oil and vanilla until combined.


Then add wet ingredients to the dry ingredients and beat on medium speed for 2 minutes.

Add hot water and stir until combined.

Stir in chocolate chips.

Pour into pan.

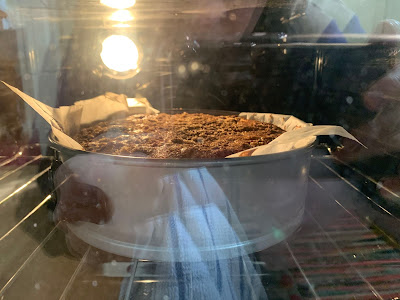
Bake for 60 - 75 minutes or until top is firm but still moist inside. Since this is a fudge cake inserted a toothpick is not appropriate as it will come out wet.

Cool in pan for 10 minutes before removing from pan to a wire rack.

Once cake is cooled make icing sugar.


NOTE: I made up the icing sugar recipe as I went along so I didn't measure anything. You need a somewhat thick consistency so start with a little of each ingredient until you get the correct consistency. So a little icing sugar than margarine than water.

Once you have correct consistency spoon gently over cake until covered as above.

The stars were bought from Woolworths supermarket in the baking aisle. So look out for a box of stars. The Christmas decoration I got from eBay but I am sure you can find in any good baking store. Store in an airtight refrigerate until ready to serve.


Original recipe from the Gluten Free Palate

Easy Classic Ratatouille Recipe

Saturday, 14 December 2019


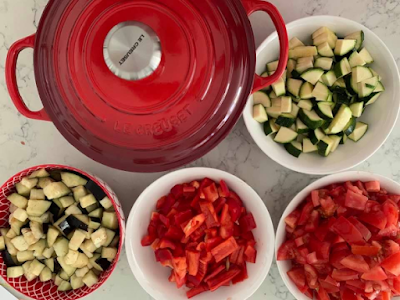
Easy Ratatouille Recipe in LeCreuset Casserole Pot


Ratatouille cooked in LeCreuset Casserole Pot


Easy Ratatouille Recipe with Polenta

I found this easy Ratatouille recipe because I got a 24cm LeCreuset Casserole pot and I wanted a French dish to be the first thing I cooked in it.

It took me over 1 year to save enough Flybuys points to get one but it would have been heaps cheaper if I bought it. I think I could have bought 3 LeCreuset Casserole pots with the money I spent to get enough points to get one! So this ain't free you do pay for it.

This recipe doesn't have garlic in it because my brother in law doesn't like it. It is still a really tasty dish and very filling teamed with polenta. It's so easy literally all you do is chop all the vegetables up put them in the pot, close the lid and let it cook. Then 30 minutes later you have Ratatouille! That's really all it is.

Just be careful you don't cut your finger like I did then need your seven year old nephew and sister to finish off cutting the rest of the veggies while you stem the bleeding. Really! I managed to recover and then my nephew helped stir the veggies while it cooked.

So easy. So good.


Easy Ratatouille Recipe

Ingredients
1 large eggplant (450 gm), cut into 1-inch pieces
1 small onion, finely chopped
1 red capsicum seeded, and cut into 1-inch pieces
1 green capsicum seeded, and cut into 1-inch pieces
900gm ripe tomatoes, chopped
2 zucchini, diced
1 tsp dried thyme
1 tsp sweet paprika
1 tbsp balsamic vinegar
extra virgin olive oil 
salt and pepper to taste

Method
Place eggplant pieces (I chose to leave skin on but you can peel if you choose) in a bowl and sprinkle with salt. Leave for 20 minutes as eggplant sweats out bitterness. Pat dry.

In a 24cm Le Creuset cast iron pot or large heavy pot heat 2 tbsp extra virgin olive oil over medium heat until simmering but not smoking. 

Add onions. Cook, stirring regularly, until translucent (about 5 minutes).

Incorporate the capsicums and cook for another 4 minutes continuing to stir.

Add tomatoes, zucchini and eggplant. Stir in thyme and paprika. Season with salt and pepper.
    
Turn stove down a little then place lid on pot and cook for 20 - 30 minutes stirring occasionally as the vegetables beak down.

Once to your liking remove ratatouille from heat and season with salt and pepper to taste. Add balsamic vinegar and generous drizzle of olive oil.

Transfer ratatouille to dinner bowls and add polenta or any other side dish you choose. Enjoy.

Recipe is from The Mediterranean Dish

Comfort Food Gluten Free Cornbread

Thursday, 8 August 2019

Gluten Free Cornbread

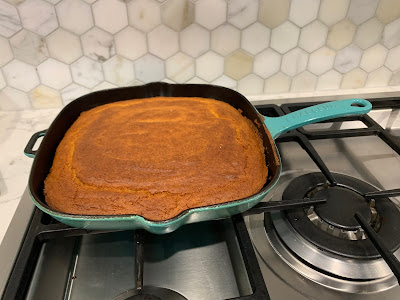
Comfort food gluten free cornbread
 
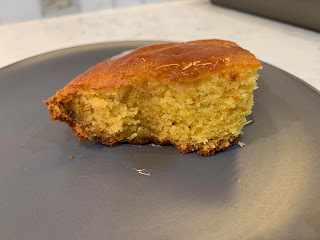
fluffy gluten free cornbread

gluten free cornbread recipe

This gluten free corn bread recipe is absolutely divine. The perfect comfort food for a wintery Melbourne day. The secret is not to over mix it.

I made the corn bread because I had a lot of left over polenta from a previous recipe and then for some reason I thought of cornbread which I have never made before. What a mistake! The next problem is deciphering between polenta and cornmeal.  

There is no difference between polenta and cornmeal. It is the same thing!  

Once I figured this out I went on a search for the prefect cornbread recipe and I found it. Think no more and get making this is such a pleasure to make and eat because it is so easy. I also loved using my skillet which I hadn't used in years. Another long lost pleasure found. I felt so old fashioned and I loved it hahaha.

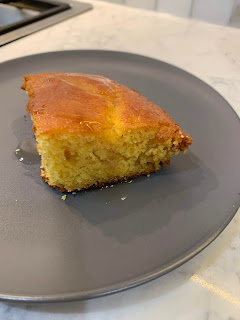
It may look a little dry but it is absolute perfection when you eat it especially piping hot from the oven.

Spread some margarine over the top and drizzle with some maple syrup and you will be in heaven.


Gluten Free Cornbread

Ingredients:
1 1/2 cups gluten free plain flour
1 1/2 cups fine polenta (corn meal - same thing)
1/3 cup sugar
2 tsp baking powder
1 tsp baking soda
1 tsp salt
2 x 60gm eggs
1 1/2 cups lactose free milk (buttermilk, whole milk, or almond milk work great)
6 tbsp dairy free margarine


Method:
Preheat oven to 200°C and grease a medium-sized cast-iron skillet (or 20 × 20 cm baking dish) with  margarine then place inside oven.

In a large mixing bowl add the flour, cornmeal, sugar, baking powder, baking soda, and salt and whisk until well combined.

Melt the margarine then let it cool slightly while you whisk together the eggs and milk in a separate bowl. Once the margarine has cooled down a little add it to the wet ingredients.

Pour the wet ingredients into the dry and stir gently with a wooden spoon making sure not to over-mix. Just make sure all are just combined. This is the secret to making it light and fluffy.

Remove the heated skillet (or baking dish) from the oven and pour the batter in. Turn the oven down to 180°C and bake for 20-25 minutes, or until the top is brown and an inserted toothpick comes out clean.

Let the cornbread cool slightly then serve with dairy free margarine and any sweet condiment like maple syrup or honey for that maximum comfort food feeling!

 Original recipe is here

Gluten Free Chocolate Coconut Cake

Monday, 29 July 2019


gluten free chocolate coconut birthday cake


 gluten free chocolate coconut cake


gluten chocolate cake recipes from scratch


homemade gluten free chocolate cake

I found this Gluten Free Chocolate Coconut Cake recipe in the July issue of the Woollies magazine. The cake in the original recipe is chocolate but I thought that was overkill so removed the cocoa and added vanilla essence and a little extra flour.

The original recipe is called a Coconut Rough Cake which was not gluten free and I found the amount of ingredients asked for in the recipe were exaggerated! I had massive amounts of icing left over even though I was very generous in coating the cake, because of this I halved some of the ingredients. 

A mistake I made was using extra large eggs so the cake came out like a custard. It's like three layers of vanilla slice! I am not sure what the consistency of this cake is suppose to be but I don't think it's bready its more eggy. I think if you love vanilla slice then you will love this cake! Please let me know if you get different results.

Please note it did take me two days to make. It is time intensive. I made the cake and ganache one day and the rest of the icing then put it together the next day.

Gluten Free Chocolate Coconut Cake 

Chocolate Coconut Cake
600gm Gluten Free plain flour
600gm caster sugar
450ml water
2 teaspoons vanilla essence
3 tsp gluten free baking powder
2 cups McKenzie's Moist Coconut Flakes
9 free range eggs, lightly beaten
3 x 400ml cans coconut milk
1 tsp salt

Ganache filling
2 x 225 pkts milk chocolate melts
2/3 cup Zymil lactose free thickened cream

Buttercream Icing
250gm Nuttelex dairy free margarine at room temperature
500gm icing sugar
1 1/2 tbs baking cocoa
4 tablespoons thickened cream

Milk Chocolate Drip
150gm chocolate milk melts
3 tablespoons Zymil lactose free thickened cream

Method
1. Preheat oven to 170C. Grease 3 x 20cm round cake tins and line with baking paper.

2. To make chocolate coconut cake, in a very large bowl combine dry ingredients with 1 tsp salt.

3. In a massively large bowl (mine was 35cm in diameter) combine coconut milk, eggs and 450ml water. Note: I found the coconut fat was solid when I opened the cans so emptied the three cans first into the bowl then beat them with an electric mixer until smooth. Then I added other ingredients and beat them all together until combined.

4. Add dry ingredients to wet ingredients and whisk until combined.

5. Divide batter between baking tins and bake for 60-90mins. I found the top two tins baked quicker than the one on the bottom shelf. The cake on bottom shelf needed an extra 15-20 minutes.Set aside to cool completely then trim tops to level cakes.

6. To make ganache filling place chocolate in a heatproof bowl. heat cream until just about to boil then pour over chocolate. Stir until chocolate is melted and refrigerate for about 20 minutes or until thick and spreadable.

7. To make buttercream icing beat margarine with a salt until pale about 3 minutes. Add icing sugar a little at a time and mix until fully incorporated. Divide mixture into three bowls add a little more to the last bowl. To make the darkest coloured icing add 1 tbspoon cocoa powder and 1 tbspn cream. To make medium coloured icing stir in 1/2 tbspoons cocoa powder and 1 tbspoon cream. For lightest coloured icing with extra mixture add two tbspoons cream and stir to combine.

8. To assemble cake sandwich layers with ganache.

9. Coat cake with some of the light coloured icing and refrigerate for 20 minutes or until set.

10. With the flat side of a butter knife coat the bottom calf of the cake with darkest buttercream. Then work your way up the cake with medium and light coloured cream until all cake is coated.

11. To make chocolate drip, place chocolate and cream in a heat poof bowl on the stove top over low heat until chocolate has melted and both ingredients have combined. Transfer mixture to a piping bag or zip lock bag with corner snipped and run around the top edge of cake creating lots of drips. Fill in top of cake with remaining chocolate sauce.


Gluten Free Apple Cinnamon Custard Cake

Wednesday, 24 July 2019


Gluten Free Apple Cinnamon Custard Cake in tin

Gluten Free Apple Cinnamon Custard Cake

Slice of Gluten Free Apple Cinnamon Custard Cake

This is a delicious light and fluffy gluten free apple cinnamon custard cake that is like no other. The recipe is a bit fiddly but it is worth it as it is so good. The original recipe is from Curtis Stone but I changed to to make it gluten free and took out the alcohol. You're welcome hahahaha.

Gluten Free Apple Cinnamon Custard Cake


Ingredients
3 large Granny Smith apples, peeled, cored
Juice and zest from 1 orange
1 1/4 cups gluten free plain flour, plus 2 tablespoons extra
1 cup caster sugar, plus 1 tablespoon extra
2 teaspoons gluten free baking powder
1/2 teaspoon salt
3/4 teaspoon ground cinnamon
1 cup extra virgin olive oil
1 cup full cream lactose free milk
2 large eggs
1 teaspoon vanilla extract
2 large egg yolks
1 teaspoon icing sugar, sifted

Method
1. Position a rack in the centre of the oven and preheat to 180C or 160C fan-forced. Line and grease a 23cm springform tin.

2. Cut the apples into 8 wedges, then cut into 1/2 cm thick slices then in a medium bowl, toss the apples with juice from the orange and set aside.

3. In another medium bowl, whisk together the 1 1/4 cups of plain gluten free flour, 1 cup of caster sugar, gluten free baking powder, salt and 1/4 teaspoon of the cinnamon.

4. In a large bowl, whisk together oil, milk, whole eggs, orange zest and vanilla to blend. Whisk dry ingredients into the wet ingredients to form a smooth batter. Be careful not to over-mix. This is the secret to getting this cake light and oh so fluffy!

5. Transfer 1 cup of the batter to a small bowl and mix in the remaining 2 tablespoons flour then set aside.

6. Whisk egg yolks into remaining batter in the large bowl just to blend then stir in the apples. Transfer the apple batter to the springform tin spreading the batter into an even layer and pressing the apples to submerge them. Pour the reserved batter evenly over the apple batter.

7. In a small bowl whisk the remaining caster sugar and cinnamon to blend then sprinkle it evenly over the batter.

Baking Gluten Free Apple Cinnamon Custard Cake

8. Bake for 50-60 mins or until a skewer inserted into the centre of the cake comes out clean and the top is golden brown. Transfer the pan to a wire rack and cool for 15 mins. Dust with icing sugar and serve with a few scoops of lactose free ice cream.


The original recipe is from the Coles Magazine which you can find here.

Nigella's Gluten Free Dark and Sumptuous Vegan Chocolate Cake

Saturday, 29 June 2019

Nigellas Gluten Free Dark and Sumptuous Chocolate Cake


Nigella's Gluten Free Dark and Sumptuous Vegan Chocolate Cake


Nigellas Gluten Free Dark and Sumptuous Chocolate Cake Slice

Nigellas Gluten Free Dark and Sumptuous Chocolate Cake Sliced

This is a cake recipe I saw Nigella tweet but I lamented that it was not gluten free and to my surprise Nigella responded and suggested I try it gluten free so here we are.

I came to my friend Helen's house and with the help of her daughter Chloe as well we made this gluten free version. I am not a fan of coffee so we took that out but you can put it in. I also couldn't find edible rose petals so am using freeze dried strawberries which I found in one of my breakfast cereals!

Coconut butter is impossible to find so here is the recipe for coconut butter I used to make it. 

Nigella's Gluten Free Dark and Sumptuous Chocolate Cake

Ingredients

For the icing
60 millilitres cold water
75 grams coconut butter (recipe link above)
50 grams soft brown sugar
1½ tablespoons cocoa
150 grams dark chocolate (min. 40% cocoa solids), finely chopped

For the cake
225 grams plain flour
1½ teaspoons bicarbonate of soda
½ teaspoon fine sea salt
75 grams cocoa
300 grams soft brown sugar
375 millilitres hot water from a recently boiled kettle
75 grams coconut oil (90ml)
1½ teaspoons cider vinegar or white wine vinegar
1 tablespoon freeze dried starwberries
1 tablespoon chopped pistachios

Method
Preheat the oven to 180C/160C Fan/Gas 4 then grease and line a round 20cm/8in cake tin. Make sure to line well if you are using a springform tin as this is a very wet batter.

Start with the icing.

Place all the ingredients for the icing except the chopped chocolate into a small heavy based saucepan and bring to the boil. Make sure everything’s dissolved. Turn off the heat, but leave the pan on the stove top and quickly add the finely chopped chocolate making sure it all melts together. Leave for a minute, then stir until you have a dark glossy icing. Leave to cool. Make sure to give the icing a stir with a spatula every now and again.


Put the flour, bicarb, salt and cocoa in a mixing bowl and use to fork to give it a good mix. (As shown above with my excellent helper Chloe, 7)

Combine the sugar, water, coconut oil and vinegar until the coconut oil has melted, and stir into the dry ingredients. Once combined use an electric hand mixer on medium speed to get rid of any lumps. Next pour into the prepared tin and bake for 35 minutes but check at the 30-minute mark to see if it is already done.

When it's ready, the cake will be coming away from the edges of the tin and a cake tester will come out clean, apart from a few crumbs. This is a fudgy cake and you don't want to overdo it.

Once the cake is cooked, transfer the tin to a wire cooling rack and let the cake cool in its tin.


Give the icing a good stir with the spatula to check it's at the right consistency then turn the cake out of the tin and cover with icing, just like Helen is doing above.

It needs to be runny enough to cover the cake, but thick enough to stay (mostly) on top. If you are using a springform tin pour over the unmoulded cake, and use a spatula to ease the icing to the edges, if you need to.

Sprinkle with strawberries and chopped pistachios or anything else that your heart desires; otherwise, you can leave it as is, gleaming darkly.

Slice and enjoy.


Original recipe is here

Gluten Free Chocolate Peanut Butter Marshmallow Cake

Monday, 17 June 2019


Gluten Free Choclate Peanut Butter Marshmallow Cake Slice


Gluten Free Chocolate Peanut Butter Marshmallow Cake Inside

 
 Gluten Free Chocolate Peanut Butter Marshmallow Cake Inside Close Up


Gluten Free Chocolate Peanut Butter Marshmallow Cake Batter


 Gluten Free Chocolate Peanut Butter Marshmallow Cake

This divine gluten free Chocolate Peanut Butter Marshmallow Cake is from the current Wollies mag. I made the cake gluten free and changed a few of the ingredients as well as the name. In the magazine it is called a gooey pudding but I didn't like that title so I changed it.

I can't go past a cake with marshmallows, they are my favourite. I didn't use gluten free marshmallows but if you are really sensitive please feel free to use them.

I also found the pink ones gave a lovely starwberry flavour which was divine so definitely use a bit of both. If you love a strawberry flavour with you chocolate then use all strawberry marshmallows.

This gluten free chocolate cake is best warm. If you put it in fridge and then decide to serve it, it gets a bit hard because the marshmallows go back to their natural state.

So for the best experience heat up add a few spoonfuls of almond milk ice cream and you will be in heaven.

Enjoy.

Gluten Free Chocolate Peanut Butter Marshmallow Cake


Cake Method
200g vegetable margarine
180g 40% cocoa dark chocolate, chopped
3 free range eggs
2/3 cup caster sugar
1/3 cup crunchy peanut butter
1 cup gluten free self-raising flour, sifted
15 white and pink marshmallows


Topping
1/3 cup boiling water
1 tbs cocoa
1 tbs caster sugar


1. Preheat oven to 200°c. Grease a 20cm cake tin and line base and sides with baking paper, making sure the paper extends above the cake tin.

2. Place margarine and chocolate in a microwave-safe bowl and heat on high for 1 minute. Stir and repeat until melted and smooth.

3. Whisk eggs, sugar and peanut butter in another bowl then pour chocolate mixture into egg mixture and stir to combine.

4. Add flour and stir until smooth.

5. Fold in 10 marshmallows (or a few more hahaha). Transfer batter to cake tin and top with remaining marshmallows.

6. Combine topping ingredients in a bowl. Pour over cake batter. Then add additional 5 marshmallows on top.

7. Bake for 20 minutes on high so a crust forms then reduce oven to 150°c and cook for a further 1 hour or until slightly firm on top and gooey in the centre. Stand for a few minutes then serve immediately.

To serve, top with ice-cream and wolf down hahaha


Original recipe here.

Related Posts Plugin for WordPress, Blogger...

Sia's Cooking Blog Designed by Ipietoon Blogger Template